


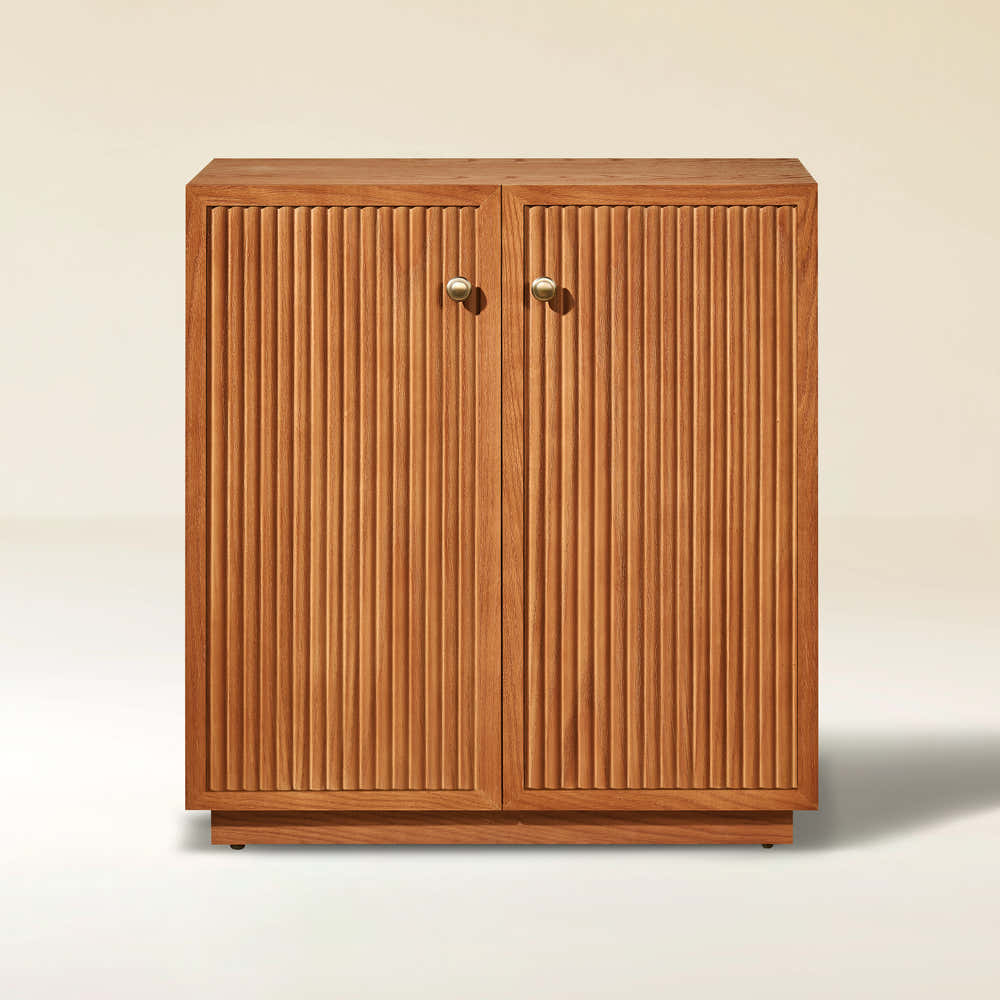


Alvar 61″ Oak 6-Drawer Chest(Set of 2)


Alvar Arched 61" Oak Sideboard with Drawers(Set of 2)

Alvar Arched 91″ Oak Modular Media Console(Set of 3)

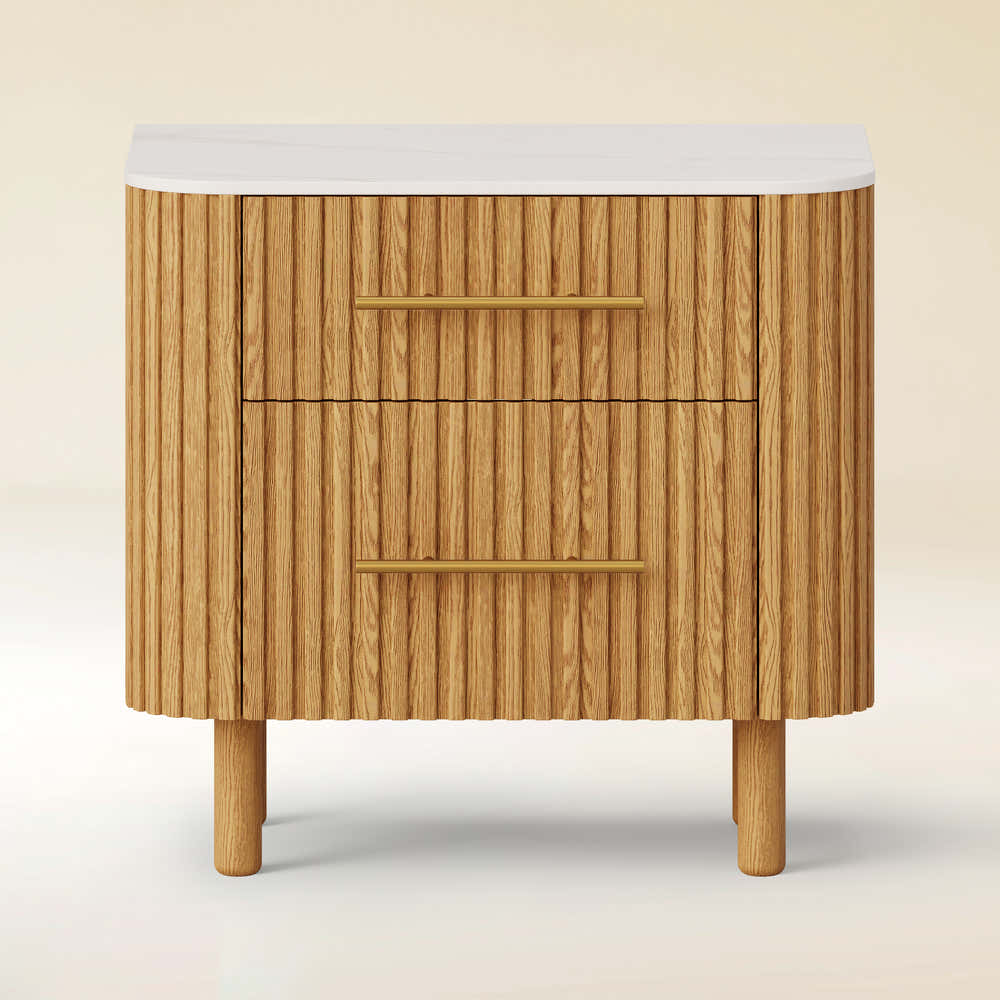
Charlie Sintered Stone Nightstand 26" W


Ethereal Crystal Radiance Round Chandelier 30"D


Ewan 63" Oak Slatted Sideboard Buffet Cabinet
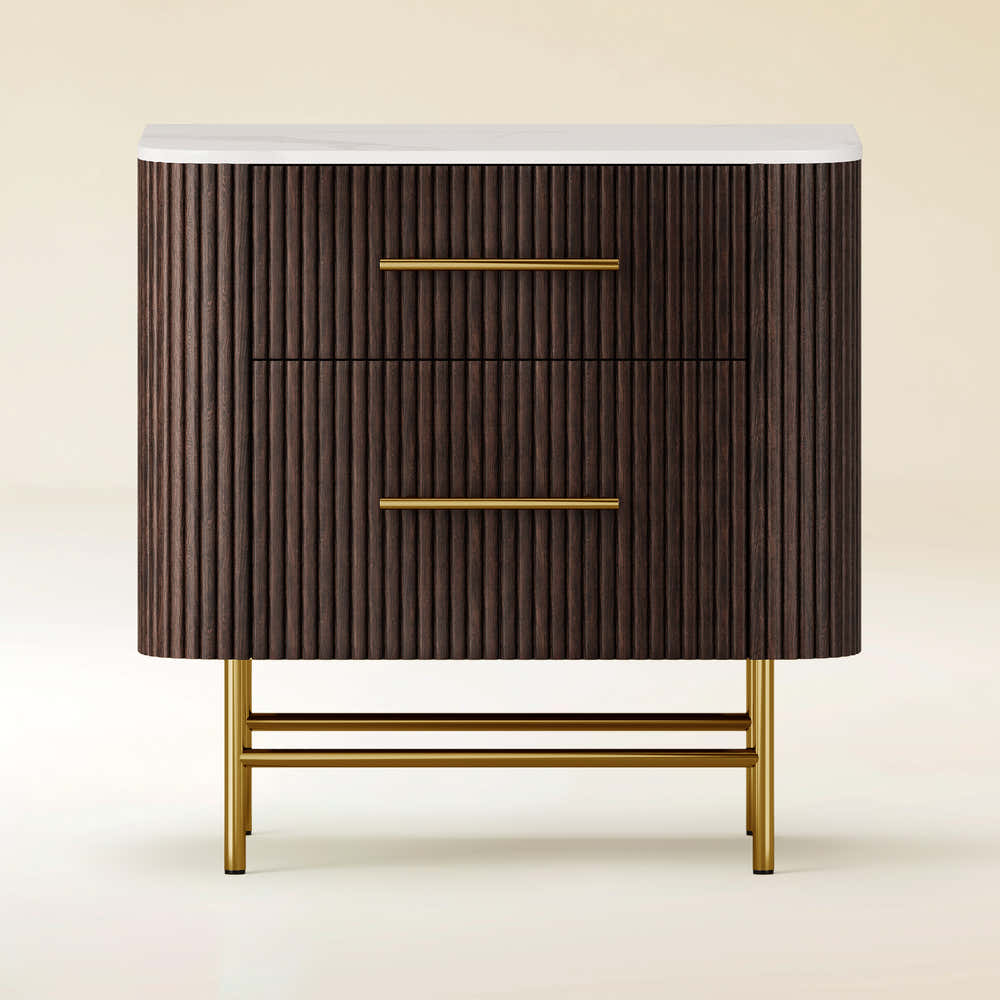
Ewan Sintered Stone Nightstand 26"W

Holt 63″ Solid Oak Console(Set of 2)

Holt 95″ Solid Oak Console(Set of 3)

Moira Alabaster Round Chandelier 24"D

Moira Alabaster Round Chandelier 32"D

Silas Extendable TV Stand 80" to 110"

Stellara Crystal Strip Round Chandelier 24"D

Sylvia Palladian Alabaster Wall Sconce 20"H

Alvar Arched 91″ Oak Media Console(Set of 3)

Ewan Oak Extendable Media Console 79" to 110"

Holt 126″ Solid Oak Console(Set of 4)

FSC FCOC47059 . FSC is dedicated to the promotion of responsible forest management
worldwide. By selecting this product, you help take care of the woorld's forests

UL-certified for indoor drying environments not directly exposed to excessive moisture or water;
Use in the United States and Canada.

Certified to Dry ETL electrical standard: suitable for use indoors in dry locations not directly exposed to excessive moisture and water
Use in the United States

CE-certified drying equipment compliant with electrical standards: Suitable for indoor drying environments not directly exposed to excessive moisture or water;
Tested for use in Europe, the UK, and other regions.


The support center has answers to questions you may have. You can also contact customer service in the support center if you can't find what you're looking for.
Support Center >
At houlte, we are committed to delivering quality, style, and great value to our customers. Our goal is to simplify your shopping experience by providing competitive prices and exceptional service.

If an item you purchased from houlte goes on sale on our website within 30 days of your purchase date, you may request a price match. This policy ensures you always receive the best value when shopping with us.
Houlte reserves the right to interpret and adjust the terms of the Price Match Policy as necessary.
Houlte has partnered with Taskrabbit to make your everyday life at home easier by connecting you with flexible and affordable ways to get your to-do’s done including furniture assembly and mounting.

1. Purchase your furniture at Houlte.
2. Check your order Dispatched and Delivered email and click the
Houlte link. You will be redirected to Taskrabbit's landing page.
3. Post your task on Taskrabbit platform.
4. Pick the best tasker to assemble your furniture.
Houlte has partnered with Taskrabbit to make your everyday life at home easier by connecting you with flexible and affordable ways to get your to-do’s done including furniture assembly and mounting.
Taskrabbit Assembly is available in most metro areas in the US. The availability of Taskers varies based on demand. When placing an order on Taskrabbit, you will need to enter your zip code. If the service is not supported in your area, you will not be able to place an order.
You can book assembly for your Houlte furniture as early as the next day after your delivery, and up to 14 days in advance, giving you flexibility to choose a time that works best for you.

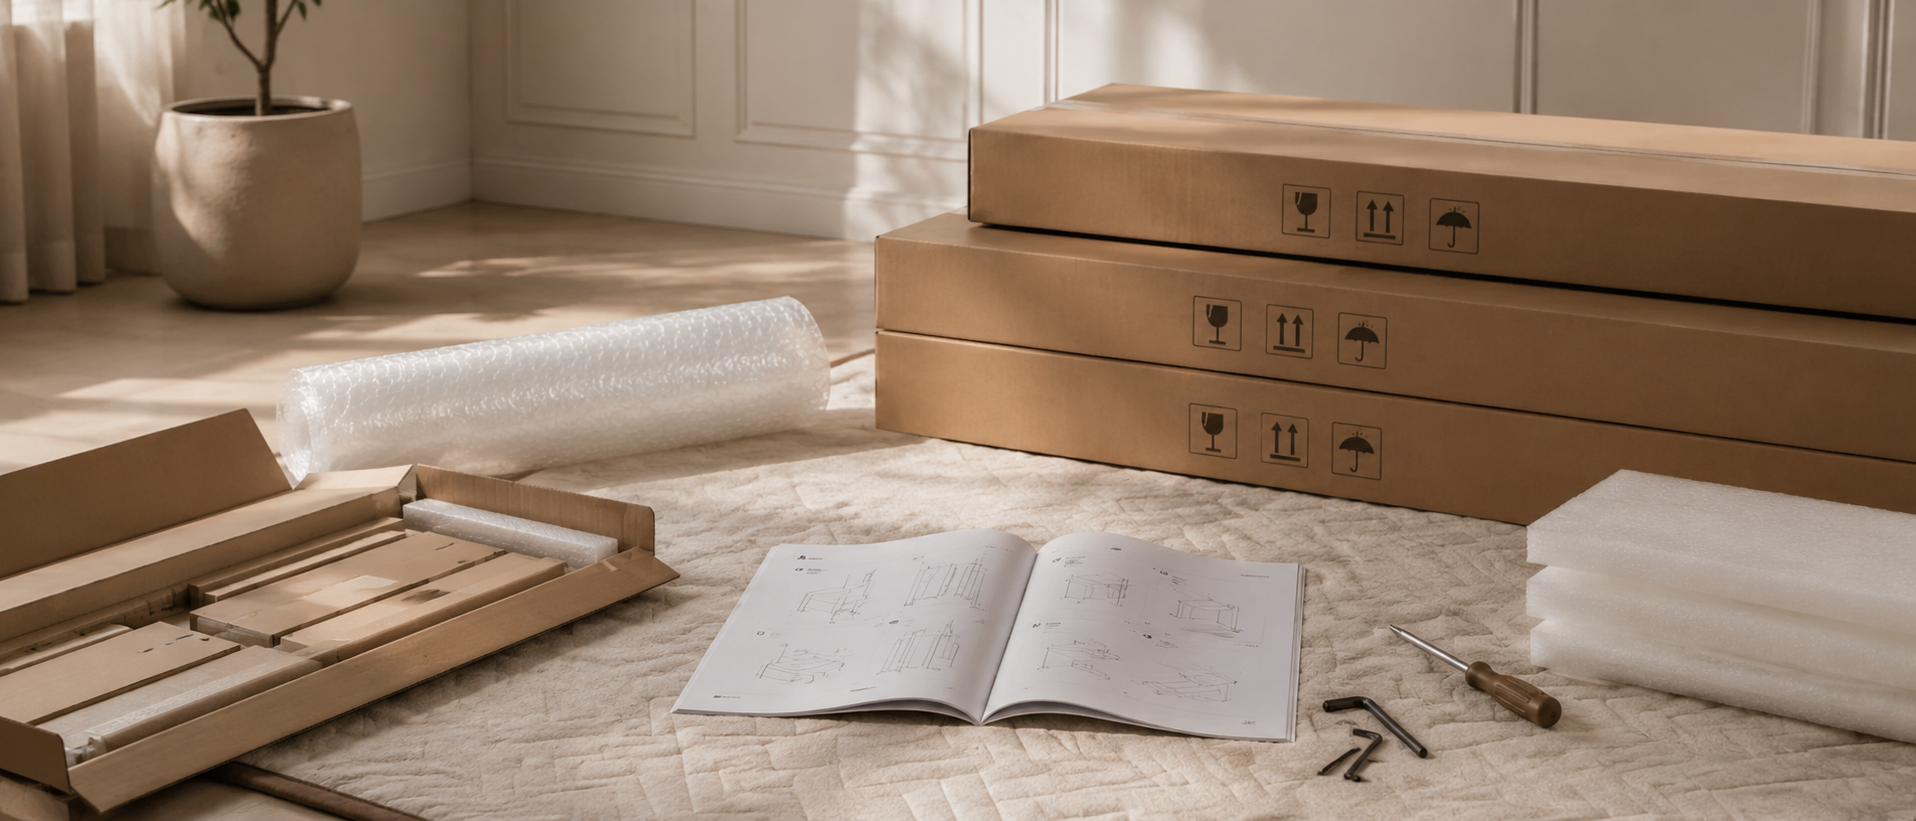
Ready to use out of the box; minimal installation may be required (e.g., handles).

Main structure is pre-built; minor components require attachment (e.g., legs).

Assembly required; multiple parts must be assembled before use.
Our furniture is built with a combination of core boards, real wood veneers, and selected solid wood parts. Each material is used for a different purpose—structure, surface appearance, or visible strength—so the final piece feels balanced in performance, finish, and cost.
Core boards form the internal foundation of the furniture. They provide structure, stability, and efficiency across large surfaces and cabinet bodies.

Stable structural board

Smooth and consistent

Functional internal board
Selected solid wood parts are used where visible strength, tactile quality, and structural integrity matter most—such as legs, frames, trim, and exposed support details.

Durable and classic

Light and versatile

Premium and elevated
Home renovation projects can be tough, affecting your budget and timeline. A big question is whether to install floors before or after kitchen cabinets.
This choice impacts everything from costs to future plans. The wrong choice can lead to costly mistakes and headaches later.

Installing floors needs careful planning and the right order. Whether it's hardwood, tile, laminate, or vinyl, the sequence is key.
When to install cabinets is also crucial for success. Different methods work better for different budgets and goals.
This guide covers the best practices for flooring under cabinets. You'll get expert tips, compare methods, and learn how to save time and money. You'll also get professional results.
Choosing the right order for installing cabinets and flooring is key. It impacts costs and upkeep needs. Experts look at each case to suggest the best plan.
Material types and cabinet styles need different setups. Your budget, timeline, and future plans are also important.
For years, the common way was to put cabinets in first, then fit flooring around them. This method was practical and fit the materials available back then.
It was chosen because it saved materials and made measuring easier. Flooring like hardwood or linoleum was easy to cut for cabinet bases.
Nowadays, there are more flexible and forward-thinking ways to install. Many experts suggest putting flooring down first, like hardwood or luxury vinyl.
This method makes it simpler to replace cabinets later. It also protects against moisture and allows for more precise fitting.
Several things decide the best order for your project. Flooring type is the biggest factor, with some materials better under cabinets.
Cost, time, and future plans also matter. The kitchen's layout and where appliances go add to the planning.
Experts have found the best way to decide if flooring goes under cabinets. Most teams now put flooring down first for homes and businesses. This change comes from years of experience and learning from different projects.
But, it's not always clear-cut. The type of flooring, the cabinets, and the project's needs can change things. Knowing these rules helps homeowners plan their renovations better.
Today, most experts agree to put flooring down before cabinets. This method makes the floor look better and keeps it even. It also means fewer problems later on.
The National Wood Flooring Association and others suggest this way for the best results. This standard has grown from years of experience and happy customers.
"Installing flooring first gives your kitchen a professional look that lasts."
Floors like laminate and engineered hardwood need to be installed all at once. They expand and contract together. If you break the installation, you might get buckling or separation.
For high-end materials like solid hardwood and natural stone, full installation is best. It keeps the floor strong and makes removing cabinets easier later.
Installing cabinets first is good for some cases. If you're on a tight budget and using basic vinyl flooring, it can save money. It's often the choice for short-term or rental places.
Very heavy stone countertops might need extra support. Installing cabinets first can make this easier. Some contractors like this method for quick jobs or tricky rooms.
Both flooring-first and cabinet-first methods have their own benefits. They meet different needs and project goals. This comparison shows how each method addresses specific priorities and constraints.
The flooring-first method offers clear benefits during and after installation. It lays a foundation for future changes and designs.
Starting with flooring makes the installation smoother. Workers can use full sheets and planks without cutting. This speeds up the process and keeps patterns consistent. Contractors avoid awkward transitions around cabinet bases.
Having flooring under cabinets makes future remodels easier. You can replace cabinets without harming the floor. This prevents issues when updating your kitchen layout.
| Installation Method | Material Savings | Labor Time | Future Flexibility | Best For |
|---|---|---|---|---|
| Flooring First | Higher Cost | Moderate | Excellent | Long-term homes |
| Cabinets First | 15-20% Less | Faster | Limited | Budget projects |
| Hybrid Method | Moderate | Longest | Good | Custom designs |
Cabinet-first benefits focus on saving money and quick installation. It's ideal for projects with tight budgets and timelines.
Starting with cabinets saves 15-20 percent on flooring costs. This is a big deal for expensive materials like hardwood or natural stone. It's best for those watching their budget.
Installers work more efficiently without the obstacles of appliances and tight spaces. This saves time and money on labor.
Choosing between flooring first or cabinets first depends on your priorities. Do you want flexibility for the future or immediate cost savings?
Installing hardwood flooring around cabinets needs you to know about wood behavior and moisture. Each hardwood type has its own challenges. Knowing these helps avoid costly fixes later.
The way you install solid versus engineered wood differs a lot. The environment of your project affects the best method to use.

Solid hardwood needs to acclimate fully before you start. Most types need 3-7 days to adjust to the room's moisture. This step stops future damage to both floors and cabinets.
Keeping the room's temperature steady is key. Aim for 60-80°F and 30-50% humidity. This keeps the wood stable during installation.
Engineered hardwood is more stable than solid wood. Its layered design fights off moisture changes better. But, you still need to install it right.
Engineered wood often works well with floating installations. It's more flexible around cabinets. Pros often choose it for tricky layouts.
Expansion gaps are a must for all hardwood floors. Leave 1/4 to 1/2 inch gaps around cabinets and islands. These gaps let the wood move with the seasons without harm.
Use quarter-round molding or cabinet toe kicks to hide gaps. Transition strips are good for doorways. Never block wood movement with caulk or rigid stuff.
Working with ceramic, porcelain, and natural stone near cabinets needs special techniques. These materials are durable and water-resistant when installed right. They can handle heavy cabinet loads without bending.
Experts usually install these floors a few inches under cabinet bases. This method makes the floor look seamless and keeps moisture out. The materials are strong enough to support cabinets for years.
Installing ceramic and porcelain tiles under cabinets is key. It ensures even grout lines and supports the weight of cabinets well.
Installers use laser levels for accuracy. They prepare the floor carefully to avoid cracks. These tiles are also good at fighting moisture damage when sealed right.
Natural stone floors need extra support because they're heavy. Stones like granite or marble might need a stronger subfloor. They also need sealing before being laid down.
Installing stone under cabinets helps avoid settling issues. This keeps cabinets straight over time. Sealing the stone protects it from water and stains.
Even grout lines make the area look professional. Planning involves matching grout with cabinet edges for a nice look. Using string lines and spacers keeps the spacing even.
| Material Type | Installation Method | Key Considerations | Maintenance Requirements |
|---|---|---|---|
| Ceramic Tile | Full coverage under cabinets | Consistent grout spacing | Regular cleaning and sealing |
| Porcelain Tile | Extended under toe kicks | Laser level alignment | Minimal maintenance needed |
| Natural Stone | Reinforced substrate required | Pre-installation sealing | Periodic resealing necessary |
| Marble Flooring | Professional installation only | Weight distribution planning | Specialized cleaning products |
Installing laminate and vinyl flooring around cabinets needs you to know each material's special traits. These floors are tough and easy to put in, making home makeovers simpler. But, each one needs a different way to fit around cabinets.
The method you pick depends on the flooring's design and what the maker says. Floating floor systems are different from glue-down ones, changing how you handle cabinets.
Click-lock systems need to be installed all at once for the best results. They use a special lock to stay strong. But, breaking this lock around cabinets can mess up the whole floor.
Experts make sure there's enough space around cabinets. This keeps the floor floating right and avoids problems later on.
Luxury vinyl plank floors work like laminate when you use a floating method. Most LVP floors do best when installed all at once under cabinets. But, some can be glued down for more options.
Vinyl floors are stable, so they handle changes in the environment better. Still, it's key to have the right gaps for the best performance over time.
Sheet vinyl is the most flexible when it comes to timing with cabinets. Using full-spread adhesive after cabinets are in can cut down on seams and waste. This makes the edges around cabinets look cleaner.
Loose-lay sheet vinyl might need to be installed under cabinets to avoid issues with edges lifting or moving.
The right tools make a big difference in flooring installation. They ensure clean cuts, accurate measurements, and safety. Professional installers use specific tools for precise work in tight spaces.
Circular saws with fine-tooth blades make straight cuts in most flooring. Jigsaws are great for curved cuts around cabinet legs. Oscillating multi-tools are perfect for undercutting door jambs and cabinet toe kicks without removing fixtures.
Miter saws give precise angle cuts for a professional look. Table saws are good for rip cuts on wider planks. Specialty jamb saws and toe-kick saws make clean cuts in tight spaces.
Laser levels help draw accurate lines across rooms. Chalk lines mark layout patterns clearly. Professional measuring tools include precision tapes and squares for perfect angles.
Compass tools scribe irregular shapes around cabinet bases. Contour gauges copy complex profiles for exact fits. Digital calipers measure precise gaps and material thicknesses for professional installations.
Safety equipment is crucial for flooring projects. Safety glasses protect eyes from debris and dust. Hearing protection prevents damage from power tool noise. Dust masks or respirators filter harmful particles when cutting materials.
Knee pads offer comfort during long floor work. Proper ventilation equipment is essential when working with adhesives in enclosed spaces. Emergency supplies, like first aid kits, should be accessible during installation projects.
Installing flooring around cabinets without removing them has three main steps: preparation, cutting, and installation. This guide helps you get professional results without the cost of removing cabinets. Each step needs specific tools and techniques for a smooth fit between your new flooring and cabinets.
Getting ready is key to a successful flooring installation. Start by clearing the area and checking if cabinets and floors are level. Look for any loose cabinet bases or uneven floors that could impact your work.
Measuring cabinet toe kicks is crucial for your cuts and material needs. Standard toe kicks are 4 inches high and 3 inches deep, but sizes can vary. Use a digital caliper or precision ruler to get exact measurements at different points.
Keep track of any oddities in cabinet installation. Measure twice, cut once is very important here, as mistakes can be expensive.
Use cardboard or thin plywood to make templates for complex cuts. These templates help you plan without wasting materials and allow for adjustments. Make a template for each cabinet type in your space.

Cutting techniques depend on the flooring type but focus on precision and clean cuts. Different materials need specific blades and speeds to avoid damage.
Lightly score cut lines before making full cuts to avoid chipping. Use zero-clearance inserts in your saw to reduce tear-out. Support long pieces well to keep cuts straight and clean.
For complex shapes, make relief cuts first. This helps prevent binding and makes curved cuts smoother.
Try each piece before installing it for real to check gaps and alignment. This step lets you make adjustments before it's too late. Make sure expansion gaps are correct around cabinets.
Finish by securing each piece as the manufacturer suggests. Use adhesives where needed and ensure floating floors can expand. Install transition pieces and trim for a professional finish around cabinet bases.
Installing flooring can lead to costly mistakes, voiding warranties, and poor results. Knowing these common errors helps homeowners and contractors achieve better outcomes. With careful planning and execution, you can avoid mistakes that affect both looks and function.
Measurement mistakes are the most common and costly in flooring projects. Many assume cabinets are square and level without checking. This leads to gaps and poor fits around cabinet bases.
Professional installers measure at multiple points and account for irregularities. They make detailed cutting templates before cutting. Accurate measurements prevent waste and ensure a good fit around complex cabinets.
Not managing gaps correctly can cause flooring to buckle, separate, and fail early. Different materials need specific gaps based on room size and climate. DIY installers often underestimate these needs or don't keep gaps consistent.
Floating floors need enough space around all edges, including cabinets. Climate and seasonal changes affect gap needs. Pros calculate these factors for local conditions.
Choosing the wrong tools can ruin cut quality and slow down the job. Each flooring type needs specific tools for the best results.
Using the wrong tools can damage materials and lead to safety issues. Laminate needs fine-tooth blades, and tile needs diamond-tipped wheels. General tools often cause problems.
Ignoring safety can lead to serious injuries and legal issues. Always use proper ventilation, eye protection, and dust masks when cutting. Pros focus on safety gear and emergency plans at all times.
Different ways to install flooring have big price differences. This depends on the materials and how much work is needed. Knowing these costs helps homeowners choose wisely, balancing upfront costs with long-term benefits.
Installing cabinets first can save 15-25% on flooring material. This is because areas under cabinets don't need flooring. It's a big savings for expensive materials like solid hardwood or natural stone.
But, material costs might go up for extra transition strips and trim. Also, cutting around cabinets can lead to more waste. This might cancel out the initial savings.
Installing flooring first needs more skilled labor and takes longer. Cutting around appliances and cabinets requires experts. This raises labor costs by 20-30%.
Installing cabinets first might seem cheaper at first. But, it needs special scribing and fitting. These extra steps can add to the project's cost.
The financial impact goes beyond the initial cost. Flooring-first methods are cheaper to maintain and easier to fix over time.
They also offer more flexibility for future renovations. When cabinets need a change, flooring-first installations save money. This can be thousands of dollars during kitchen updates.
| Cost Factor | Flooring First | Cabinets First | Difference |
|---|---|---|---|
| Material Requirements | 100% coverage | 75-85% coverage | 15-25% savings |
| Labor Complexity | High precision work | Standard installation | 20-30% higher |
| Future Renovation | Cabinet flexibility | Flooring replacement | $3,000-8,000 savings |
| Maintenance Access | Easy repairs | Limited access | Ongoing savings |
Getting seamless results means knowing the right installation methods. Experts know that perfect flooring installations need careful planning and precise work. These professional tips help make installations look great and last long.
Starting with a detailed plan is key to perfect transitions. Pros map out the floor to hide seams and ensure a smooth flow. They use tools like laser levels to keep everything aligned.
Using special cutting techniques is what sets pros apart. Back-cutting and relief cuts fit around tricky spots without gaps. This keeps the floor clean and looking good.
Before starting, pros sort materials for a uniform look. This step stops color mismatches and keeps the look flowing smoothly.
Good color matching needs the right light and careful material choice. Pros use special lights to check colors. They also plan how to install materials to blend them well.
Pattern matching is key with wood and stone. Experts arrange planks and tiles to create natural, random patterns.
Smooth transitions between floors prevent tripping and look professional. Contractors use special tools to level floors and meet safety codes.
Regular quality control checks catch problems early. Pros have steps like checking the floor base and material acclimation. They also do final inspections.
These checks ensure quality and help with warranties. Pros keep detailed records of these steps for future needs.
The choice of flooring for your cabinets depends on your project's needs and future plans. Each flooring type has its own installation challenges. You must think about your budget, timeline, and any future changes you might make.
Getting help from a professional installer is crucial for complex decisions. They can look at your situation and suggest the best way to install. This depends on your flooring, cabinet style, and home layout.
Getting good results comes from planning well, whether you install flooring first or cabinets first. It's important to know what you want most and choose the method that fits your goals.
Your decision should consider both your current needs and future flexibility. Think about how your choice might affect future kitchen updates or appliance changes.
Choosing skilled professional installation can make your floors last longer and look better. The right installation, quality materials, and expert work create beautiful, useful spaces. These spaces add value to your home for years.
Take your time to think about all the factors before deciding. Your flooring investment needs careful planning for long-term satisfaction and performance.
Yes, in most cases. Professional contractors say it's best to put flooring under cabinets. This gives you a consistent floor height and makes future renovations easier. It's also good for floating floors like laminate and engineered hardwood.
Installing flooring first has many benefits. It makes the installation process easier and allows for future cabinet changes. It also keeps the floor height the same and hides any gaps. Plus, it makes future kitchen updates simpler without having to replace the flooring.
Installing cabinets first is good for saving money, using basic vinyl flooring, or for rental properties. It's also useful when you have heavy stone countertops or if you're watching your budget closely.
Not putting flooring under cabinets can save you 15-25% on flooring costs. But, you might spend more on transition strips and trim pieces later. And, you might need to replace the flooring when you update the cabinets.
Yes, hardwood floors should go under cabinets. This keeps the floor stable and prevents problems like buckling or gapping. It also lets the wood expand and contract naturally.
Yes, tile flooring benefits from being installed under cabinets. It ensures even grout lines and prevents water damage. It also supports heavy cabinets and looks seamless.
It's possible but not recommended. Laminate flooring needs to be installed continuously. Installing it around cabinets can damage the floor and void the warranty.
You'll need a circular saw, jigsaw, oscillating multi-tool, laser level, measuring tapes, squares, and safety gear. This includes glasses, hearing protection, and a dust mask.
Use digital calipers and measuring tools to get exact measurements. Toe kicks are usually 4 inches high and 3 inches deep. Make templates for complex cuts and double-check your measurements.
You'll need 1/4 to 1/2 inch gaps around cabinets for seasonal movement. Use transition strips or molding to hide these gaps while keeping the floor functional.
Common mistakes include bad measuring, assuming cabinets are square, and wrong gap management. Using the wrong tools and rushing the job can also cause problems. Always follow manufacturer guidelines to avoid warranty issues.
Installation time varies based on the flooring, room size, and cabinet type. Installing cabinets first can save time but requires skilled labor. A professional can usually finish an average kitchen in 1-3 days.
Yes, luxury vinyl plank (LVP) should go under cabinets. LVP is more forgiving than laminate but still needs expansion gaps. This ensures the floor stays stable and looks good.
Installing flooring first makes replacing cabinets easier and cheaper. You can remove old cabinets without damaging the floor. New cabinets can go right over the flooring, saving you from costly replacements.
Yes, for complex projects or expensive materials, hire a professional. They have the right tools and know-how to ensure a job well done. This also protects your warranty.


Share:
Are MDF Cabinets Good for Your Home?
Secure Countertops to Cabinets: A Step-by-Step Guide