


Alvar 61″ Oak 6-Drawer Chest(Set of 2)


Alvar Arched 61" Oak Sideboard with Drawers(Set of 2)

Alvar Arched 91″ Oak Modular Media Console(Set of 3)

Charlie Sintered Stone Nightstand 26" W


Ethereal Crystal Radiance Round Chandelier 30"D


Ewan 63" Oak Slatted Sideboard Buffet Cabinet
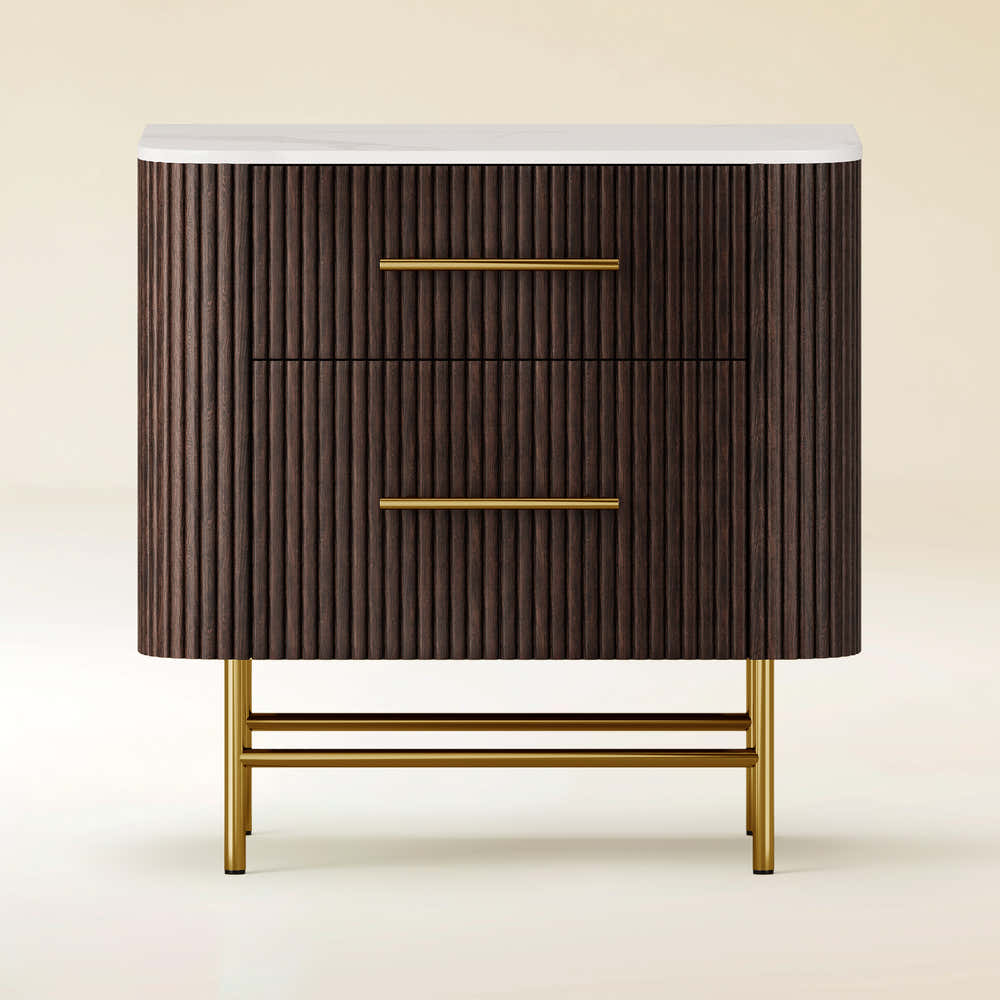
Ewan Sintered Stone Nightstand 26"W

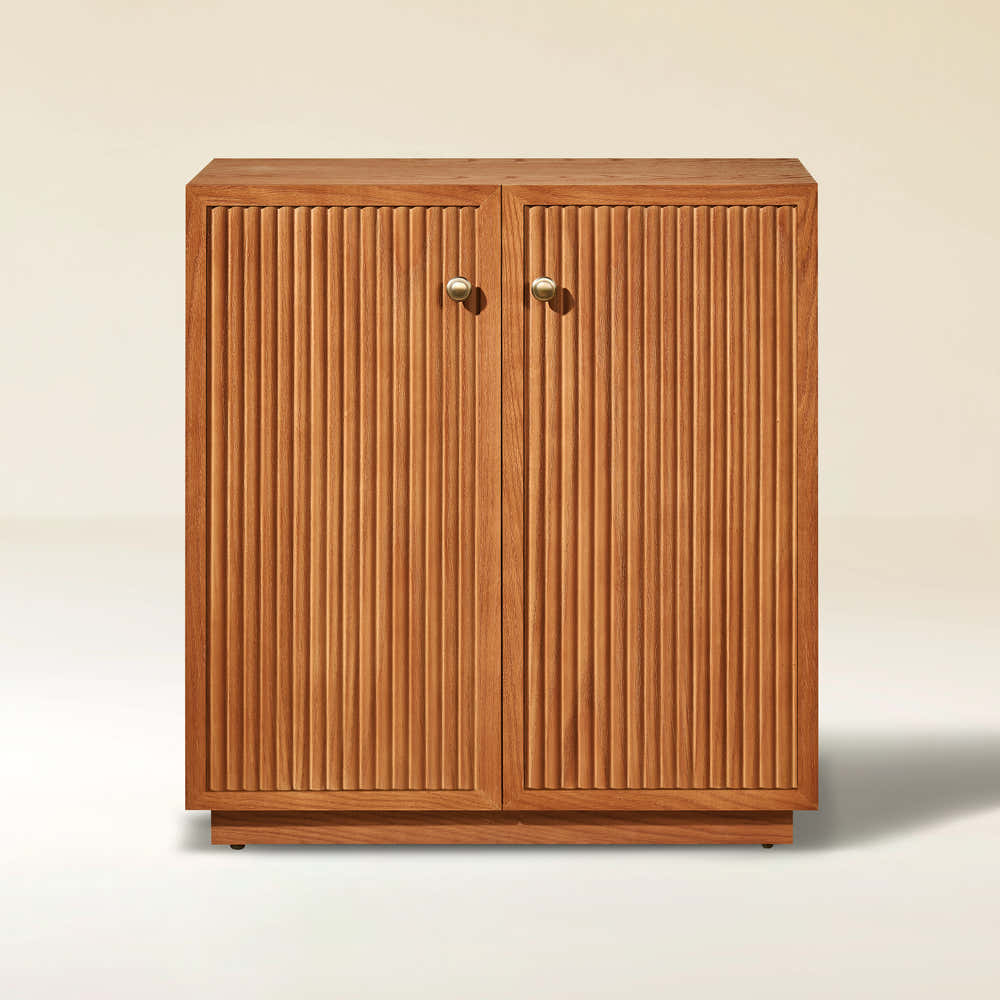
Holt 63″ Solid Oak Console(Set of 2)

Holt 95″ Solid Oak Console(Set of 3)

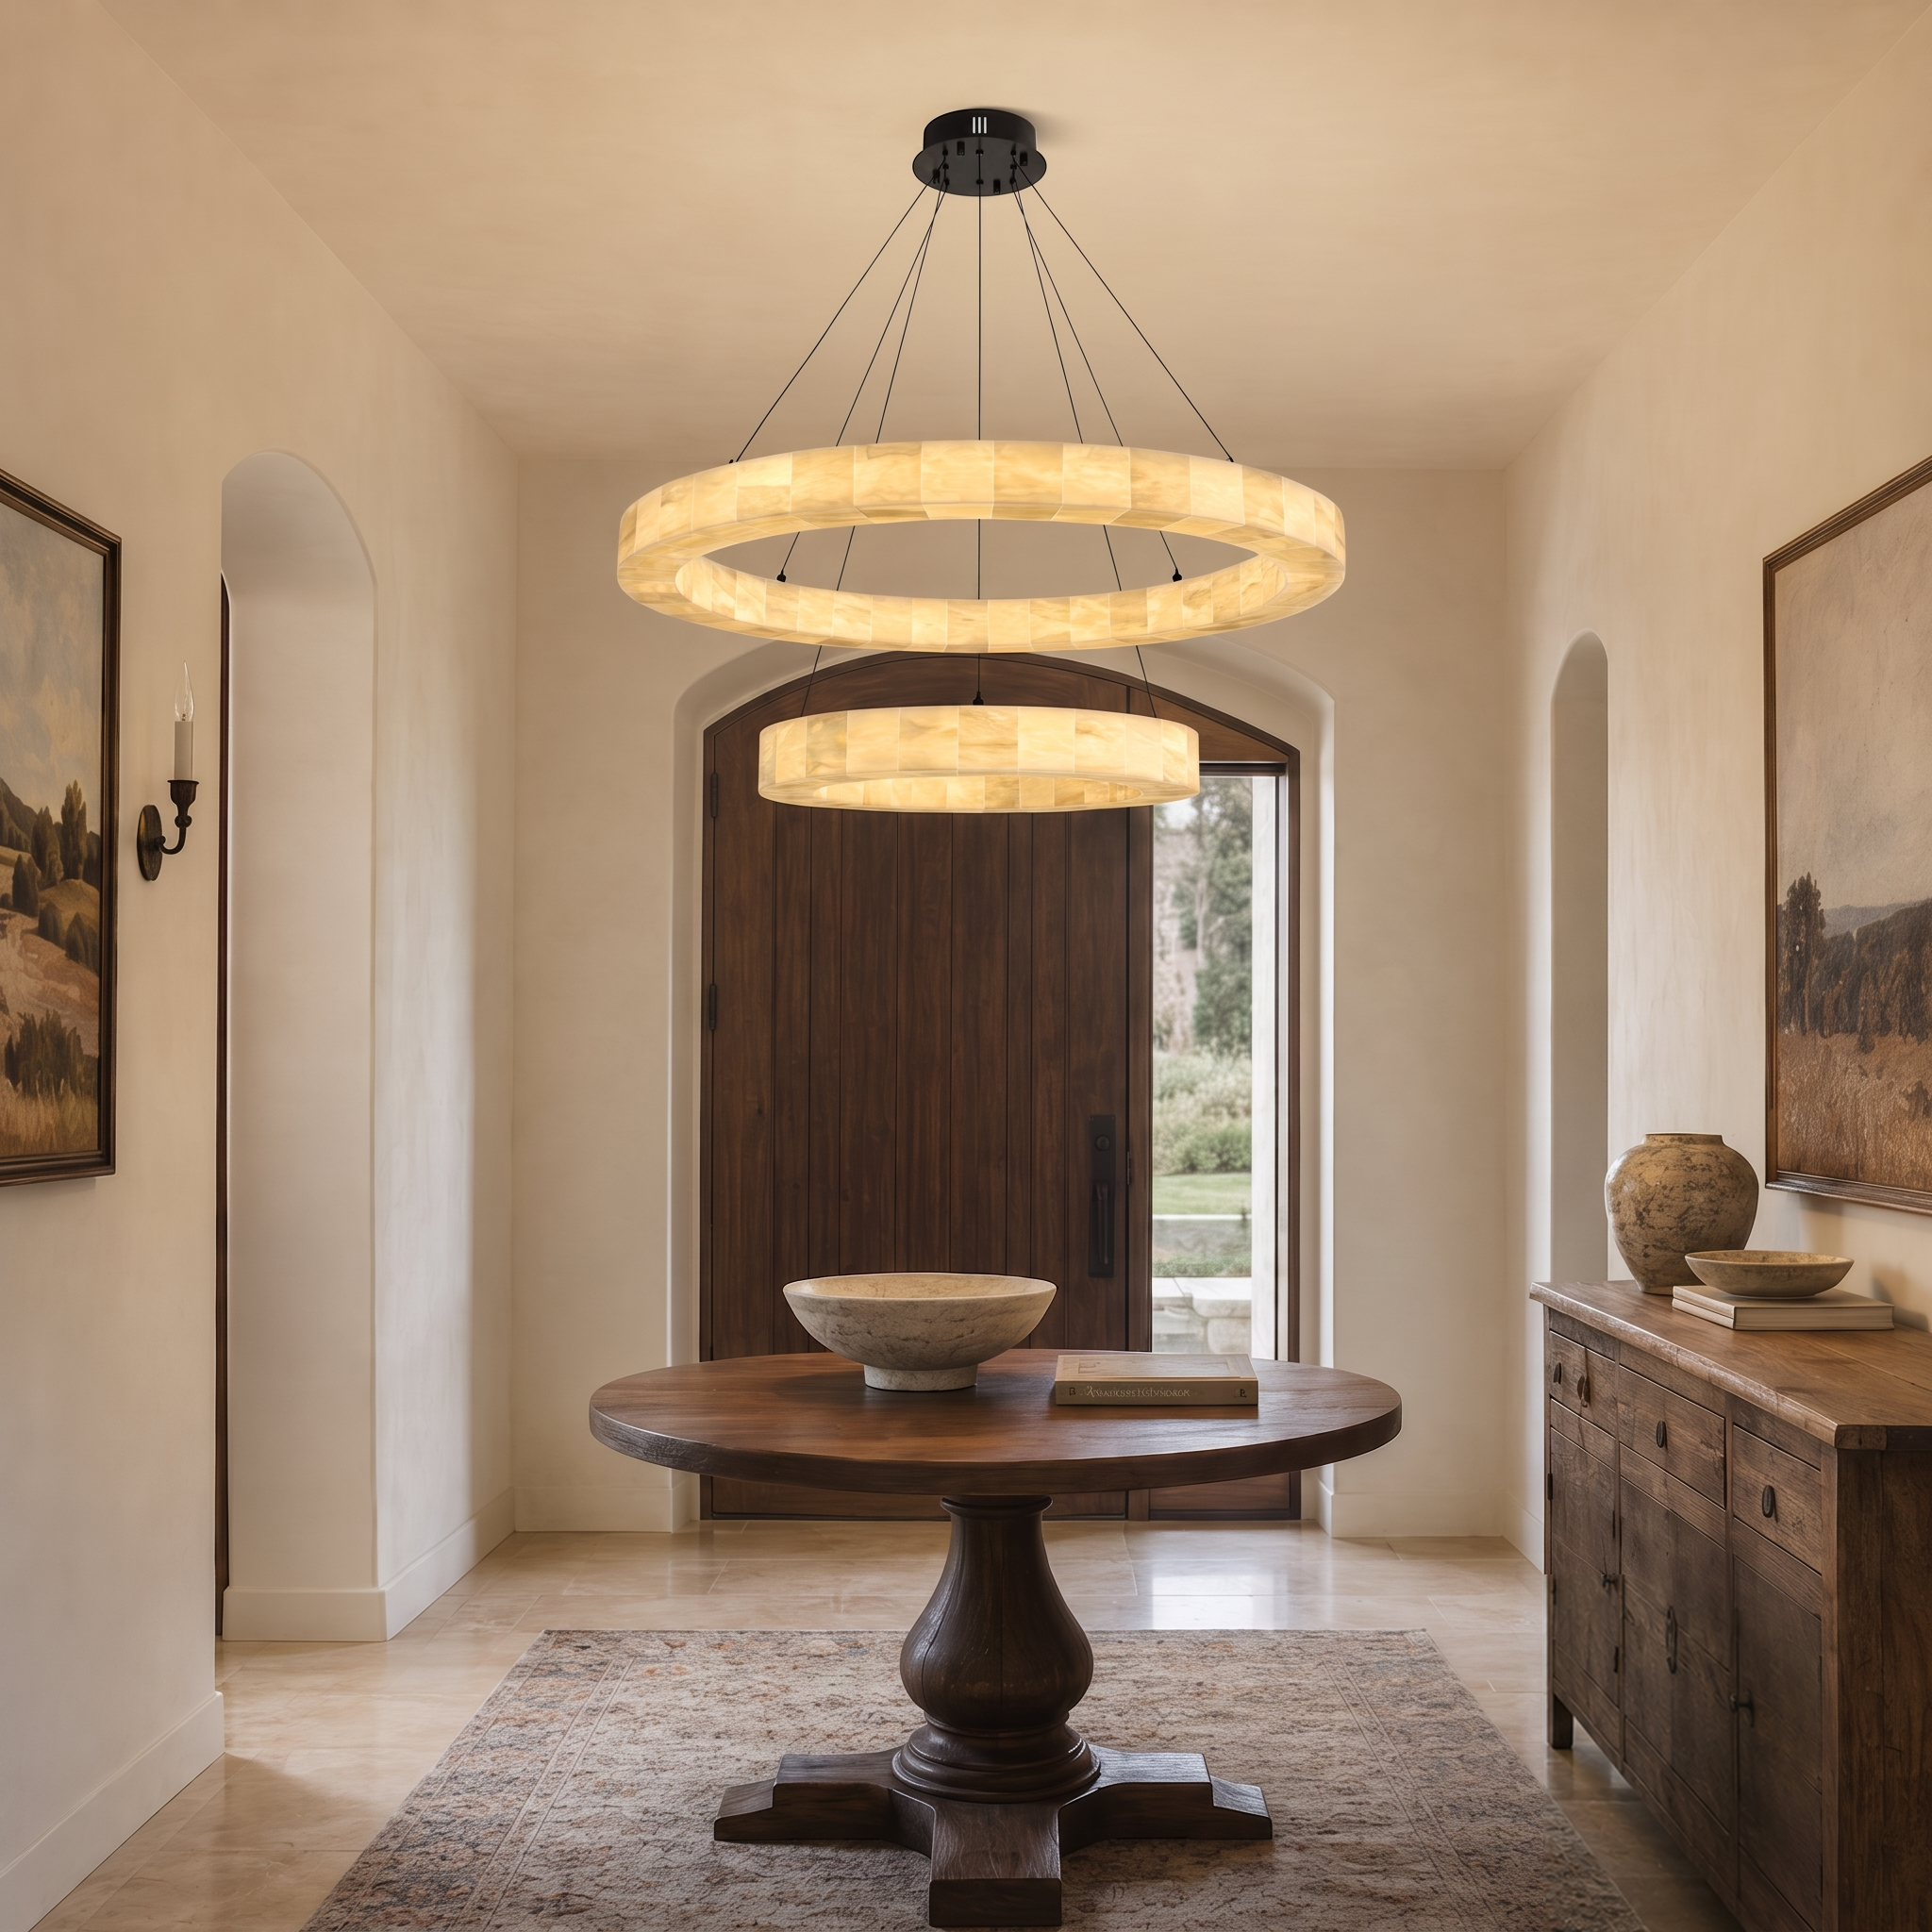
Moira Alabaster Round Chandelier 24"D

Moira Alabaster Round Chandelier 32"D

Silas Extendable TV Stand 80" to 110"

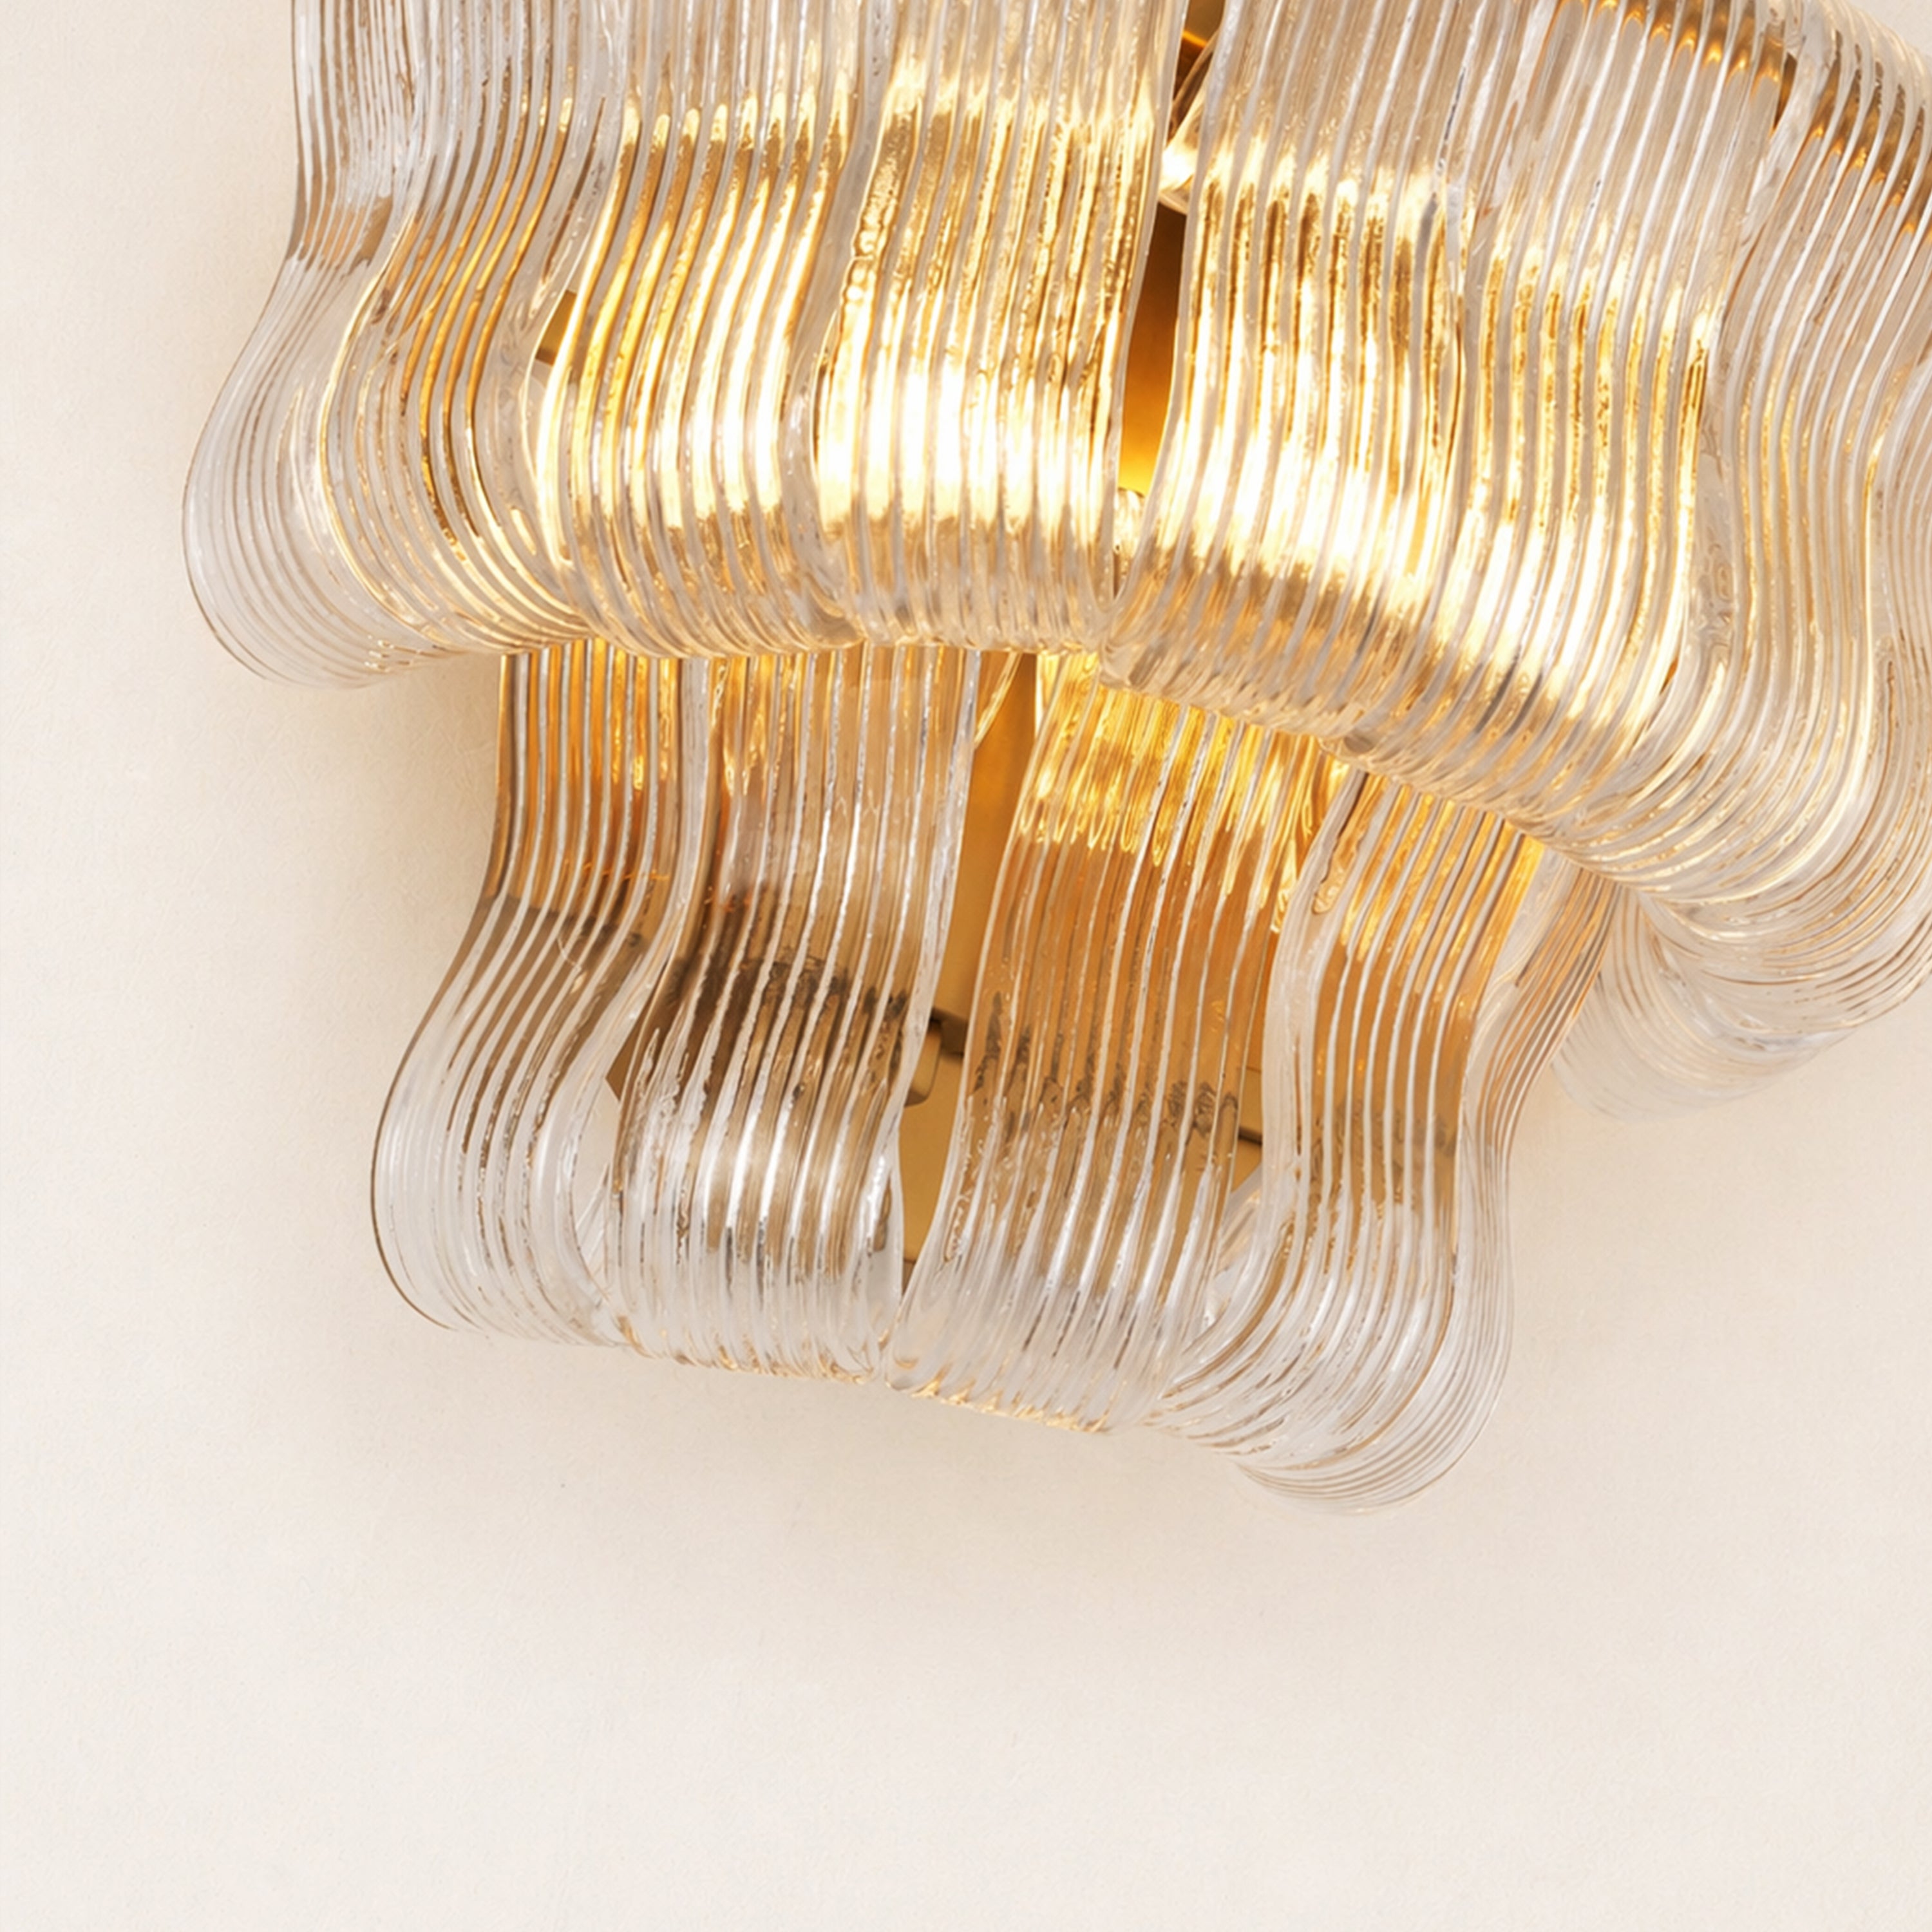
Stellara Crystal Strip Round Chandelier 24"D

Sylvia Palladian Alabaster Wall Sconce 20"H

Alvar Arched 91″ Oak Media Console(Set of 3)

Ewan Oak Extendable Media Console 79" to 110"

Holt 126″ Solid Oak Console(Set of 4)

FSC FCOC47059 . FSC is dedicated to the promotion of responsible forest management
worldwide. By selecting this product, you help take care of the woorld's forests

UL-certified for indoor drying environments not directly exposed to excessive moisture or water;
Use in the United States and Canada.

Certified to Dry ETL electrical standard: suitable for use indoors in dry locations not directly exposed to excessive moisture and water
Use in the United States

CE-certified drying equipment compliant with electrical standards: Suitable for indoor drying environments not directly exposed to excessive moisture or water;
Tested for use in Europe, the UK, and other regions.


The support center has answers to questions you may have. You can also contact customer service in the support center if you can't find what you're looking for.
Support Center >
At houlte, we are committed to delivering quality, style, and great value to our customers. Our goal is to simplify your shopping experience by providing competitive prices and exceptional service.

If an item you purchased from houlte goes on sale on our website within 30 days of your purchase date, you may request a price match. This policy ensures you always receive the best value when shopping with us.
Houlte reserves the right to interpret and adjust the terms of the Price Match Policy as necessary.
Houlte has partnered with Taskrabbit to make your everyday life at home easier by connecting you with flexible and affordable ways to get your to-do’s done including furniture assembly and mounting.

1. Purchase your furniture at Houlte.
2. Check your order Dispatched and Delivered email and click the
Houlte link. You will be redirected to Taskrabbit's landing page.
3. Post your task on Taskrabbit platform.
4. Pick the best tasker to assemble your furniture.
Houlte has partnered with Taskrabbit to make your everyday life at home easier by connecting you with flexible and affordable ways to get your to-do’s done including furniture assembly and mounting.
Taskrabbit Assembly is available in most metro areas in the US. The availability of Taskers varies based on demand. When placing an order on Taskrabbit, you will need to enter your zip code. If the service is not supported in your area, you will not be able to place an order.
You can book assembly for your Houlte furniture as early as the next day after your delivery, and up to 14 days in advance, giving you flexibility to choose a time that works best for you.

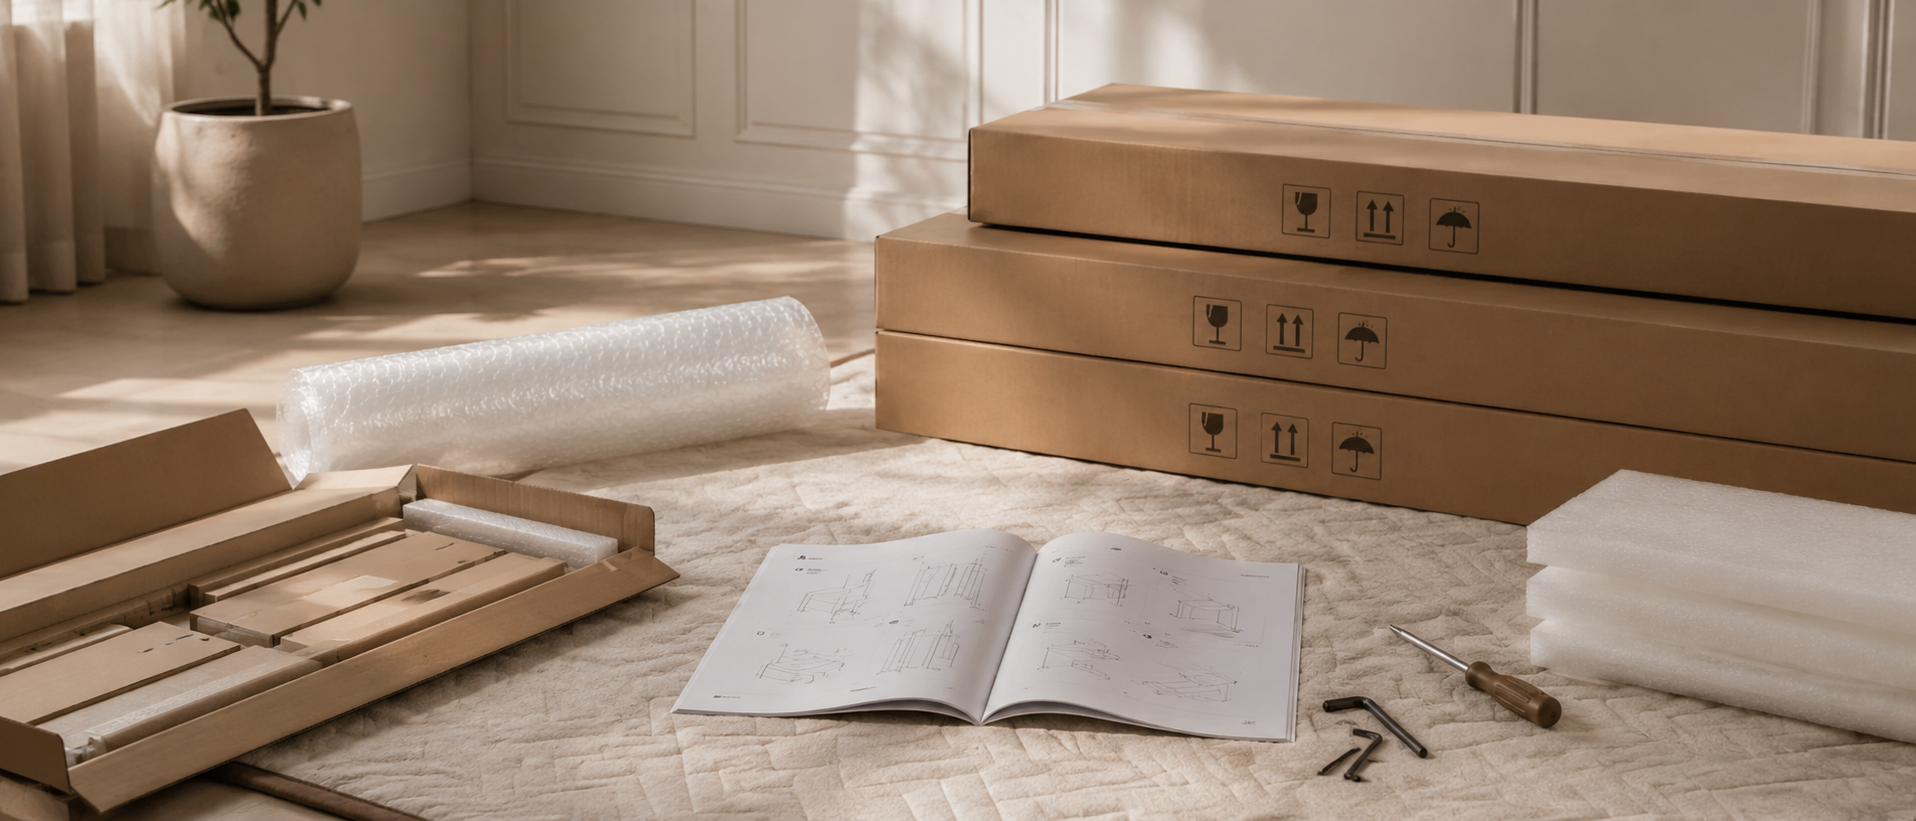
Ready to use out of the box; minimal installation may be required (e.g., handles).

Main structure is pre-built; minor components require attachment (e.g., legs).

Assembly required; multiple parts must be assembled before use.
Our furniture is built with a combination of core boards, real wood veneers, and selected solid wood parts. Each material is used for a different purpose—structure, surface appearance, or visible strength—so the final piece feels balanced in performance, finish, and cost.
Core boards form the internal foundation of the furniture. They provide structure, stability, and efficiency across large surfaces and cabinet bodies.

Stable structural board

Smooth and consistent

Functional internal board
Selected solid wood parts are used where visible strength, tactile quality, and structural integrity matter most—such as legs, frames, trim, and exposed support details.

Durable and classic

Light and versatile

Premium and elevated
Kitchen renovation projects often start with removing old cabinets. Many homeowners do this themselves to save money and learn DIY skills. It's a task that needs careful planning and the right tools for success.

Removing cabinets right protects your kitchen surfaces. It also lets you reuse materials in future projects. Whether you're redoing your kitchen or just updating it, knowing how to remove cabinets is key.
This guide will show you how to remove cabinets step by step. You'll learn how to handle both face-frame and frameless cabinets. Safety considerations and tips for organizing materials will help your project go smoothly.
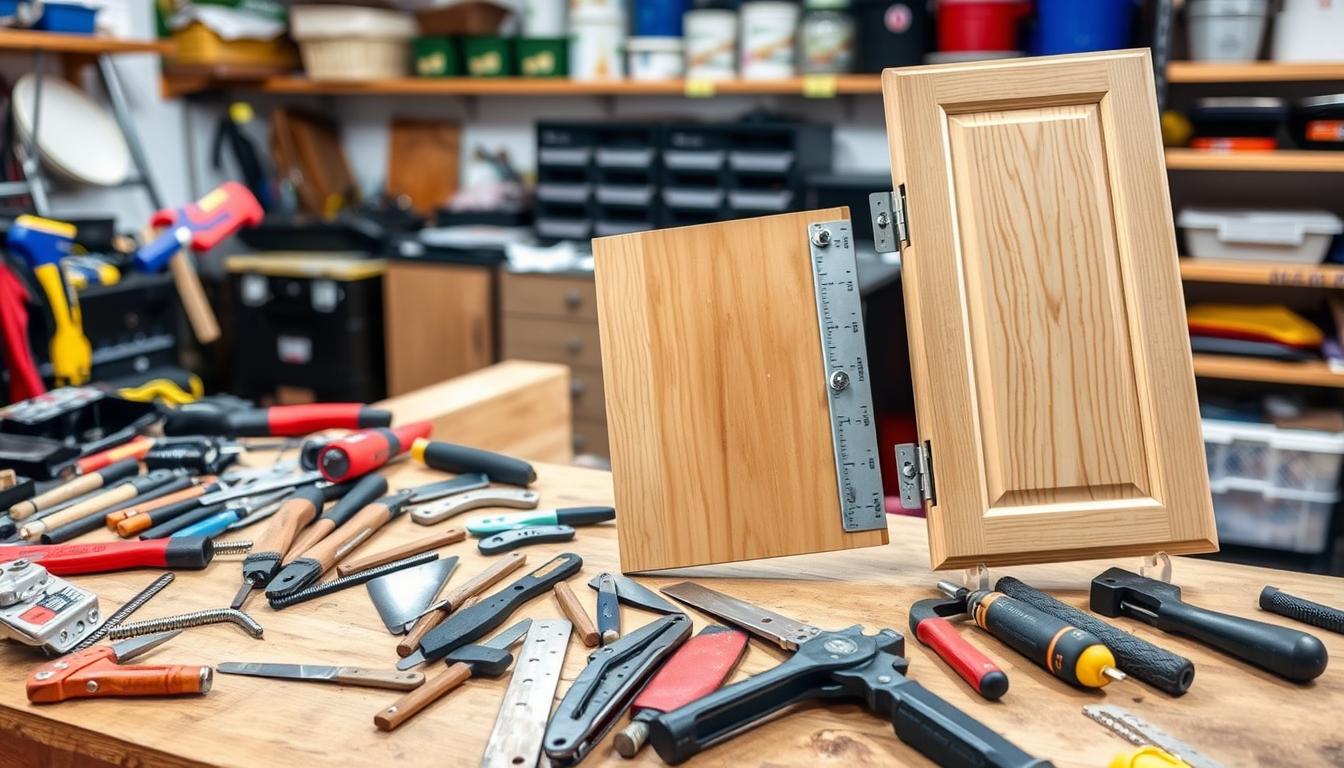
Before you start your DIY cabinet removal project, make sure you have the right tools. The right tools can make a big difference. They can turn a tough job into an easy one.
Having all your tools ready and within reach makes the job easier. This helps keep your project on track and avoids delays.
Every cabinet disassembly project needs basic hand tools. You'll need screwdrivers in different sizes and types. This includes Phillips and flathead in small, medium, and large sizes.
Adjustable wrenches are great for different bolt and nut sizes. Pry bars and crowbars help with stubborn connections without damage. A sharp utility knife cuts through caulk and adhesive.
Pliers are useful for gripping and removing damaged screws. A measuring tape is for recording cabinet sizes. A level ensures proper alignment when removing cabinets.
Power tools make cabinet removal faster and easier. A cordless drill with various bits quickly removes screws. Reciprocating saws cut through tough connections and damaged fasteners.
Oscillating multi-tools are perfect for tight spaces. They cut through caulk, adhesive, and small nails with precision. An angle grinder is for heavy-duty cutting tasks, like metal brackets.
Cordless impact drivers offer extra power for stuck screws. Their small size lets you reach tight spots behind cabinets.
Protecting yourself is crucial during cabinet disassembly. Safety glasses protect your eyes from debris. Heavy-duty work gloves keep your hands safe from sharp edges.
Dust masks or respirators prevent inhaling harmful particles. Steel-toed boots protect your feet from falling parts. Knee pads are for comfort and protection at floor level.
A first aid kit should be nearby for minor injuries. It's important to stay safe during the project.
| Tool Category | Essential Items | Estimated Cost | Primary Function |
|---|---|---|---|
| Hand Tools | Screwdrivers, wrenches, pry bars, utility knife | $50-$100 | Basic disassembly and separation |
| Power Tools | Cordless drill, reciprocating saw, multi-tool | $200-$400 | Fast cutting and screw removal |
| Safety Equipment | Safety glasses, gloves, dust mask, steel-toe boots | $75-$150 | Personal protection and injury prevention |
| Specialty Items | Knee pads, measuring tape, level, first aid kit | $40-$80 | Comfort and precision work |
Getting your kitchen ready for cabinet removal makes the process smoother. It helps avoid damage to your home and belongings. This step is key to a successful project.
There are three main steps to prepare. First, clear out all cabinet contents. Next, safely disconnect utilities. Lastly, protect the surfaces around the cabinets. Each step needs careful planning and attention to detail.
Start by emptying all cabinets in your kitchen. Move dishes, cookware, food, and cleaning supplies to a safe place. This step prevents breakage and keeps things clean during removal.
Take photos of valuable items before you store them. This helps with insurance claims if something goes wrong. Wrap fragile items in bubble wrap or newspaper for extra safety.
Make a list of what you removed. Label boxes clearly for easy unpacking later. Store food in coolers or temporary places with the right temperature.
Turn off the kitchen's electrical power at the breaker before starting. Remove under-cabinet lights and safely disconnect garbage disposals. If wiring looks complex, call a licensed electrician.
Turn off water lines to any plumbing fixtures in your cabinets. Disconnect dishwashers, ice makers, and water filters as the manufacturer suggests. Have towels ready to catch any water left in the lines.
Gas appliances need special care during remodeling. Call a qualified gas technician to safely disconnect gas lines. Never try to do it yourself because it's dangerous.
Use heavy-duty plastic sheeting or cardboard to cover floors. Secure it with painter's tape around the edges. Use extra layers in busy areas where cabinets will be moved.
Shield walls and backsplashes with plastic or cardboard. Be careful around cabinet connections to avoid scratches. Move or cover furniture that can't be moved from the area.
Make sure paths are clear for moving cabinet parts. Measure doorways and hallways to ensure big pieces can pass through. Remove rugs and obstacles to prevent trips and falls.
| Preparation Task | Time Required | Difficulty Level | Essential Tools |
|---|---|---|---|
| Clearing Cabinet Contents | 2-4 hours | Easy | Storage boxes, labels, bubble wrap |
| Disconnecting Electrical | 1-2 hours | Moderate | Wire nuts, electrical tape, voltage tester |
| Shutting Off Plumbing | 30-60 minutes | Easy | Adjustable wrench, towels, bucket |
| Surface Protection | 1-2 hours | Easy | Plastic sheeting, painter's tape, cardboard |
Good preparation saves time and avoids costly mistakes in your kitchen remodel. Skipping this step can damage surfaces or break things. Spending time on preparation makes the removal process easier.
Take photos of your preparation work. These pictures help you remember where wires and plumbing connections are for later. Keep all disconnected parts in labeled containers for easy identification.
Before starting any cabinet demolition, it's crucial to set up safety rules. These rules protect everyone involved and the property. By planning safety first, you avoid accidents and costly mistakes.
Kitchens have their own set of challenges. You might find hidden utilities, old materials, and structural connections. Professional contractors know that skipping safety checks can lead to delays and extra repairs.

Look at how cabinets connect to walls and their role in supporting other kitchen parts. Upper cabinets hold a lot of weight from dishes and appliances. They also support countertops or other cabinets.
Check the wall behind mounted cabinets for load-bearing elements. Look for drywall anchors, wall studs, and mounting brackets. Take photos before you start removing anything.
Watch for signs of structural stress like sagging or damage. Cabinets that are settling or separating from walls need extra care. Never assume that older installations follow current building codes.
Turn off the electrical power at the circuit breaker before you start. Use a voltage tester to make sure it's off. Removing under-cabinet lighting and outlets often involves electrical work.
Find water supply lines behind or through cabinets. Turn off the water valves and have towels ready for spills. Be careful with dishwasher, garbage disposal, and ice maker lines.
Mark utility locations with bright tape to avoid damage. Keep emergency contact numbers for electricians and plumbers handy. Some utility disconnections need a professional to ensure safety.
Wear safety glasses, work gloves, and closed-toe shoes. Cabinet edges can be sharp, and debris can fly. Dust masks help protect against particles from old finishes and adhesives.
Use proper lifting techniques and get help for heavy items. Upper cabinets can be very heavy. Plan how to lift and move big pieces safely.
Keep your workspace organized to avoid accidents. Store tools in their places and clean up debris regularly. Make sure everyone knows their role in the removal process. Cabinet safety is everyone's responsibility.
Removing wall-mounted cabinets needs a careful plan to keep everyone safe. Upper cabinets are heavy and hard to reach. This job requires the right steps to avoid damage or injury.
Removing upper cabinets needs a team effort. Never try to remove them alone. Experts say you need at least two people for standard cabinets and three for the big ones.
Always put safety first when working with overhead cabinets. Take your time and don't rush.
Begin by taking off all cabinet doors and drawers. This makes the cabinet lighter and easier to work on. Use a drill or screwdriver to remove hinges from both the door and the cabinet frame.
Next, remove all handles, knobs, and drawer slides. Put these parts in labeled containers or bags. This makes it easy to find them later if you want to reuse them.
Take pictures of the hardware before you remove it. This helps when you put it back or sell the parts. Also, remove any adjustable shelves and shelf pins to make the cabinet even lighter.
Find the screws that hold the cabinets to the wall studs. These screws are usually inside the cabinet boxes near the top and bottom rails. Use a stud finder to find the studs before you start.
Start by removing screws that connect adjacent cabinets. These screws are shorter and easier to get to. Work from one end of the cabinet to the other.
Have someone support the cabinet before you remove the last screws. Never remove all screws without support. The cabinet should stay stable while you disconnect it.
Put helpers at both ends of the cabinet before you remove it. Use the right lifting techniques to avoid injury. Solid wood cabinets can be very heavy, so teamwork is key.
Lower the cabinets slowly and keep control. Clear a path to where you'll put them and remove any obstacles. Use furniture dollies to move heavy cabinets over long distances.
Put the cabinets on cardboard or moving blankets to protect them. This also protects your floors. Stack similar cabinets carefully to save space and stay organized.
Removing base cabinets is a big challenge. They hold heavy countertops and plumbing, which need careful handling. It's important to work step by step to avoid damage and injury.
Removing base cabinets has three main steps. Each step is crucial for a safe and efficient process. Knowing these steps helps avoid damage and keeps everyone safe.
Start by finding all screws that hold the countertop. Most are driven up from inside the cabinet. Use a flashlight to spot these screws.
Stone and quartz countertops are heavy and need extra care. They use adhesive and screws. Use a utility knife to cut the adhesive before removing.
Laminate countertops are easier to remove once the screws are out. But older ones might need a pry bar. Be careful not to damage the cabinet doors.
Turn off the water supply before starting. Place buckets under the lines to catch water. Remove the P-trap and lines carefully to avoid water damage.
Find screws that connect cabinets. They're usually every 12 to 16 inches. Remove them slowly while holding both cabinets.
Disconnect electrical connections for appliances. Turn off power at the breaker before touching anything. Secure wire nuts and tape connections to prevent shorts.
Start with end units that have fewer connections. Remove screws that hold the cabinet to the wall. These screws are near the top of the cabinet box.
Base cabinets are heavy, so get help when lifting. Use the right lifting technique to avoid injury.
Consider breaking down big cabinets into smaller parts. Remove doors, drawers, and shelves to make them lighter. This makes moving them safer and easier.
Work from one end of the kitchen to the other. Keep paths clear for moving units. Stack removed parts safely to prevent tripping and damage.
After removing cabinets, you'll need to break down the cabinet boxes into parts. This makes it easier to handle, store, and throw away materials. It also lets you save valuable hardware and wood for other projects.
Before you start, take photos of how the cabinets were built. Different makers use different ways to put cabinets together. Knowing how yours were built helps you take them apart right and saves materials for later.

Face frames are the front part of most cabinets. They are attached to the body with screws, nails, or glue. First, look at how they were attached to figure out how to take them apart.
Start by removing screws with a drill or screwdriver. For nails, use a pry bar gently to avoid breaking the wood. Take your time with this step - rushing can damage the wood you might use again.
For glue, use a hair dryer to soften it. This makes it easier to separate without damaging the wood. Keep the face frame pieces organized by size and condition for future use.
Cabinet sides and shelves are attached with screws, dowels, or cam locks. Modern cabinets often use cam locks that need a special tool to open.
Start by removing adjustable shelves. Store the shelf pins in a labeled container - they're easy to lose but useful for future projects.
For fixed shelves, find where they connect to the sides. Dowels might need a little tap to come loose. Work from top to bottom to keep things organized.
"Proper documentation before disassembly saves hours of confusion later when you need to understand how components fit together."
Back panels are usually the simplest to remove. They're held by small nails or staples around the edge. Use a pry bar or nail puller to remove them carefully.
Interior parts like lazy Susans and pull-out drawers need special care. Each one is mounted differently, depending on the maker. Remove these parts before you tackle the main cabinet.
Document how you remove complex parts. Take photos of the mounting hardware. This is very helpful if you want to use these parts again or need to remember how they work.
Kitchen renovation projects often face complex built-in units that need special care for safe removal. These units have unique designs, mounting systems, and utility connections. It's important to plan carefully before starting to avoid damage.
Specialty cabinets are heavier and may support other parts of the kitchen. They usually need to be taken apart completely. Take photos and document all connections before you start to help with reassembly later.
Corner cabinets are tricky due to their internal parts and connections to other units. Remove all internal parts like lazy Susans and swing-out shelves first. Then, disconnect the mounting hardware.
See how the corner cabinet connects to others. Most share structural elements. Remove these connections carefully to avoid damage.
Accessing screws in corner cabinets can be hard. Use a right-angle drill or flexible shaft to reach them. Work from one side to the other, supporting the cabinet as you go.
Tall cabinets and pantries need extra care because of their height and weight. They may support the structure and need bracing during removal. Use scaffolding or a sturdy ladder to safely reach the top.
Start by removing all shelving and drawers to lighten the load. Work from top to bottom, disconnecting screws first. Many tall cabinets have multiple points of attachment.
Check for crown molding or trim that may be attached to ceiling-height cabinets. Remove them carefully to reuse them. Some pantry units have electrical connections for lighting that need to be disconnected before removal.
Islands and peninsulas are complex due to their utility connections and finished surfaces. Turn off power to any electrical outlets or lighting before starting. Cap electrical wires safely and label them for later use.
Disconnect plumbing connections if the island has a sink or dishwasher. Turn off water supply valves and drain lines before removing. For gas connections, call a licensed professional for safe disconnection and capping.
Islands often have finished backs and sides that need careful handling. Use moving blankets or cardboard to protect these surfaces during removal.
Remove the countertop first, following the right techniques for the material. Then, disconnect the island from any electrical or plumbing rough-ins in the floor. Many islands are secured with screws through the base into floor joists or concrete anchors.
| Cabinet Type | Primary Challenges | Special Tools Needed | Safety Considerations |
|---|---|---|---|
| Corner Cabinets | Internal mechanisms, tight access | Right-angle drill, flexible shaft | Support adjacent cabinets |
| Pantry/Tall Units | Height, weight, structural support | Scaffolding, temporary bracing | Multiple person lift required |
| Islands | Utility connections, finished surfaces | Wire caps, pipe wrenches | Professional gas line service |
| Peninsulas | Structural attachment, utilities | Oscillating saw, pry bar | Check for load-bearing elements |
Peninsula cabinets may be attached to walls or other cabinets, requiring cuts through connecting materials. Use an oscillating saw for precise cuts. Be careful not to damage walls or adjacent cabinetry.
Removing specialty cabinets can be the most challenging part of a DIY project. Plan extra time and consider professional help for utility disconnections. With the right preparation and tools, even complex units can be managed by homeowners.
Removing cabinet hardware gets tough when it's old, painted, or stuck with adhesives. Moisture, paint, and adhesives can make it hard. Knowing the right tools and methods is key to avoid damage.
Being patient is crucial when facing these challenges. Hurrying can damage parts or strip screws. Slow and careful methods are better than quick fixes.
Corroded and painted screws need special care to avoid damage. Start by applying *penetrating oil* and wait 15-20 minutes. WD-40 or rust penetrants work well on old hardware.
Impact drivers offer more power than drills. Their hammering action helps loosen stuck screws. For really stuck screws, try these steps:
If screws break off, drill pilot holes and use screw extractors. These tools grip the screw shaft for removal.
Modern cabinets use strong adhesives. Heat is the best way to break these bonds.
Use a heat gun on medium to soften adhesives. Work slowly, applying heat for 30-60 seconds. Be careful not to damage the surrounding material.
For tough adhesive bonds, try these methods:
Piano wire or thin cable can cut through adhesive bonds. This is great for cabinets stuck to drywall.
Paint buildup around hardware makes removal harder. Multiple layers can hide screws and mechanisms.
Chemical paint strippers work well but need safety precautions. Follow the directions and wait for the right time. *Mechanical removal* with wire brushes or scrapers is another option.
For badly damaged hardware, cutting might be needed. Use these tools wisely:
Remember, cutting means you can't reuse the hardware. Decide if it's worth the effort to keep damaged parts. Sometimes, cutting is faster and saves more valuable materials.
Salvaging materials during cabinet removal can save money and help the environment. It turns waste into useful items for future projects. Both pros and DIY fans benefit from saving money and the planet.
Sorting materials well needs planning and a clean workspace. Set up sorting stations before you start. This way, you won't miss or damage anything important.
Start by sorting hardware into different groups. Things like hinges, drawer slides, and handles are often worth a lot. Clean each piece well to remove old glue and dirt.
Use labeled containers for each type of hardware. Sort screws, bolts, and small parts by size and material. Special parts like soft-close hinges are worth more and need extra care.
Take photos and measure valuable cabinet parts. This helps when planning future projects or selling items. Note the condition and any missing parts.
"The most sustainable approach to renovation is to reuse what you can, recycle what you cannot reuse, and dispose of the rest responsibly."
Keep salvaged materials in a cool, dry place to avoid damage. Wood parts need special care to avoid warping or mold. Wrap doors and drawer fronts before stacking.
Store materials by type and how often you use them. Keep often-used parts easy to find. Use labels for everything, including what's inside and when it was stored.
| Material Type | Storage Method | Protection Requirements | Expected Lifespan |
|---|---|---|---|
| Cabinet Doors | Vertical stacking with padding | Moisture barriers, temperature control | 10+ years |
| Hardware Sets | Labeled containers by type | Rust prevention, organized access | 15+ years |
| Wood Panels | Flat storage with spacers | Ventilation, weight distribution | 8-12 years |
| Metal Components | Dry storage with desiccants | Corrosion prevention coating | 20+ years |
Keep detailed records of your materials, including photos and measurements. Digital systems make it easy to find and share information. Update your records often to reflect any changes.
Dispose of damaged cabinet parts properly, based on their material and local laws. Wood can often be recycled or used for DIY projects. Check with local waste management for wood recycling options.
Metal parts can be recycled. Sort different metals like aluminum, steel, and brass for better recycling value.
Handle hazardous materials carefully, following local environmental rules. Old paint, stains, and adhesives can be harmful. Contact local environmental agencies for disposal advice.
Keep records of donations for tax benefits. Many home improvement donations can be tax-deductible. Save receipts and photos of donated items.
Learning how to take apart cabinets is key to a successful kitchen makeover. It also helps you save money by using materials again. This guide shows you how to do it safely and right, keeping your home and money safe.
By planning well and working carefully, you'll get great results. The tools and methods you've learned work for many types of cabinets. This knowledge is very useful for any home improvement project you might do later.
Being patient when taking apart cabinets helps avoid expensive errors. Taking your time to disconnect utilities and protect areas around the cabinets saves money on repairs. The materials you save can also cut down on costs for your new kitchen.
It's smart to get help from a pro for big changes or special cabinet materials. Your safety and the success of your project are more important than rushing.
The skills you've learned are not just for kitchen makeovers. They are useful for any home renovation project. Whether it's a small update or a big renovation, these skills give you confidence for your next project.
You'll need screwdrivers, adjustable wrenches, and pry bars. Also, utility knives, cordless drills, and reciprocating saws are helpful. Don't forget safety glasses, work gloves, dust masks, and steel-toed boots for protection.
Start with the upper cabinets. This way, they won't fall and hurt you or damage anything. Remove doors and hardware first. Then, disconnect the upper cabinets from one end to the other, making sure they're supported.
Turn off the power at the circuit breaker before you start. Use a voltage tester to check if the circuits are off. For plumbing, shut off the water supply and have towels ready for any spills. If it's too complex, call a professional.
Yes, many parts can be reused. Clean the hardware well and sort it by type and size. Cabinet doors and drawer fronts often have value if stored properly.
For stuck screws, try penetrating oil, heat, or an impact driver. For adhesive bonds, use a heat gun, adhesive solvers, or an oscillating tool. Be patient to avoid damage or safety risks.
Check the structure to find load-bearing parts. Turn off power and water, and wear protective gear. Lift carefully and have help for heavy items. Always communicate with your helpers.
Corner cabinets need their internal parts removed first. Then, remove the cabinets in a specific order. Kitchen islands require careful disconnection of electrical, plumbing, and gas lines. They might need to be disassembled completely.
Remove the countertops before taking out the base cabinets. They might be held in place with screws or adhesive. Stone countertops are heavy and fragile, so it's best to have a professional remove them.
Use plastic sheeting or cardboard to cover the floors. Tape walls, backsplashes, and appliances to prevent scratches. Remove or protect nearby furniture and clear paths to avoid damage.
Sort hardware by type and size, and clean everything well. Make an inventory with photos and measurements. Store materials in a controlled environment, using proper wrapping and stacking. Keep them safe from moisture, extreme temperatures, and damage.


Share:
How to Choose Kitchen Cabinets: A Complete Guide
How to Extend Cabinets to Ceiling: A Complete Guide